Here's how I host my own AIM server
Tired of Discord? Want to chat with your friends using that perfectly good Windows 98 machine? Well now you can spin up your own AIM server.

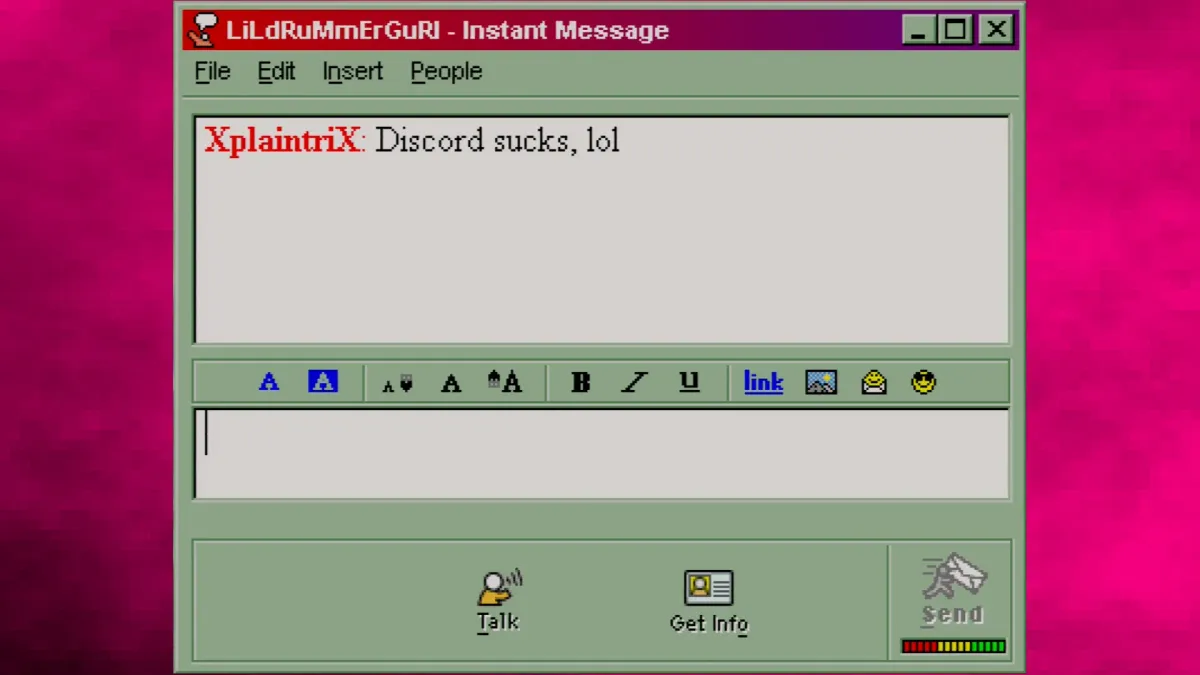
In high school, most days began and ended with AIM.
This was before everyone had text messages (or cell phones). Everything from class projects to entire relationships took place in an AIM window. Needless to say, I have some nostalgia for it.
Discord hasn't been treating me well recently, so I decided to give Open OSCAR Server a try, which lets you spin up an AIM/ICQ server and connect many old clients up to it, and I'm glad I did!
I talked about this more in-depth in a recent video (YouTube/PeerTube), and my friend Kate (Macintosh Librarian) posted a video as well covering AIM in greater detail. But I figured I'd put a blog post together going into the specifics of how I'm hosting it. Maybe it'll help you try out AIM again!
Set up a Debian Trixie server
I won't go into how to install Debian Trixie... that's a whole different topic, and this post assumes you already have that information under your hat.
You can pretty easily get this working on a low-spec VPS, assuming you don't have hundreds of users you're planning on chatting with. I hosted mine at home for a bit but moved it to a bottom-tier VPS when I started sharing it with friends. It'd probably work with a Raspberry Pi as well, although I haven't tried it yet.
If you're hosting at home, or otherwise behind a firewall, you'll need to open a port for AIM (the default is 5190). Clients will connect with that port. Some clients might not be able to easily switch the port, so it's probably best to stick with the default here.
If you're hosting it at home and don't have a static IP address, you'll want a dynamic DNS provider. I personally use No-IP (not sponsored) and I'm happy with the results, but dealing with dynamic DNS can be a challenge for the uninitiated: if you're willing to part with $5-$10 USD/mo, cloud providers will make this much easier (and with a static IP). The important thing is that your server is reachable through either a fixed IP address, or a domain name, and has that open port (5190 by default).
I also recommend setting up your firewall to reject traffic from sources that aren't you, at least while configuring Open OSCAR Server. The server defaults are pretty open, which is great for a fun project inside your home network, but they aren't really suitable for sharing on the internet, so until you have those locked down, firewall rules are your friend.
Installing Open OSCAR Server and testing
Download Open OSCAR Server
Open OSCAR Server uses GitHub to publish releases. Head on over to the repo and snag a release.
I prefer to do this via wget while SSH'd into my server:
wget [RELEASE URL]Of course, replace [RELEASE URL] with the actual URL of the .tar.gz file from the project.
Then, once I had it, I extracted it with tar:
tar -zxvf open_oscar_server.X.XX.X.linux.x86_64.tar.gzOf course, replace the X.XX.X with the version you downloaded.
Testing Open OSCAR Server
If you're just running this on your local machine, you can probably cd into the subdirectory it just created, and run the program. But assuming you want to run this on another machine, like I did, we have more configuration to do before we get chatting.
I first went into the subdirectory with cd, and then I used my favorite text editor to edit the settings.env file.
There's three modes for the Open OSCAR Server to listen for clients:
LOCAL, which is the default: your AIM client is on the same machine as the server. You probably don't want this one unless you know what you're doing.- In a
LANmode, Open OSCAR Server is on the same internal network as the AIM clients. If you're planning on chatting between computers inside your home network, and not across the internet, that's probably what you want. - Or in
WANmode, Open OSCAR Server is running across the internet from your AIM clients. If you're planning on sharing the server with friends outside your home, that's probably what you want.
For testing, I set this on two variables inside settings.env:
OSCAR_LISTENERSwhich configures how Open OSCAR Server listens, andOSCAR_ADVERTISED_LISTENERS_PLAINwhich configures the advertised listener that you should give to clients like AIM.
In the case of the latter, you should also set this up with your IP address or domain name which you plan to give to clients.
So, for example, if you were sharing this publicly on a VPS with a domain at example.domain, you might set OSCAR_LISTENERS to WAN://0.0.0.0:5190 and OSCAR_ADVERTISED_LISTENERS_PLAIN to WAN://example.domain:5190. If you're inside your network, you'd replace WAN with LAN and the example domain with whatever IP address you gave the server.
The config file itself explains this pretty well. The important thing is that they match, LAN and LAN or WAN and WAN or both on both.
After your configuration is done, you should be able to run it with ./open_oscar_server and then configure your clients.
Configuring clients
There's probably a thousand different clients, but the important thing is that many versions of AIM have a configuration section where you can replace the default (and defunct) login.oscar.aol.com with whatever you specified in OSCAR_ADVERTISED_LISTENERS_PLAIN. In AIM 5.1, which I am using on my machines, it's in "Setup", then the big "Configuration" button.
Once you replace that URL in the settings, it should hopefully be a snap, just enter literally any screen name, literally any password, and you should hopefully get signed in.
Have a friend do the same. If you're set up for LAN, they'll have to be on your network. If you set it up WAN-wise, you'll have to give them access through any firewalls or whatnot, but it should work! It did for me anyway! :)
Controlling Open OSCAR Server with systemd
I'm going to get in trouble here, aren't I?
Open OSCAR ships a systemd service, which makes running the server when you aren't SSH'd into it a piece of cake.
The docs go into specifically how to set this up, so I don't want to just copy/paste their words: if you want to have the server run when you aren't connected to it, you should go do that thing.
Making user authentication actually work
Now that Open OSCAR Server is working even when we aren't signed into it, we need to make it so you actually need a password to sign in.
For this, I like using systemctl edit --full, which uses your default editor to edit the service file we just installed:
sudo systemctl edit --full ras.serviceOnce we're in the file, we need to set the environment variable DISABLE_AUTH.
This variable, confusingly presented as a double negative, needs to be set to false in order to require authorization. I would have called it "REQUIRE_AUTH" myself, but whatever.
In the file, under [Service], look for that DISABLE_AUTH variable and change it up:
Environment="DISABLE_AUTH=false"Save the file after making that change. Then, because we're changing a systemd daemon, we need to reload things:
sudo systemctl daemon-reloadNow, try signing in with the same screen name and password you were just using. It should work! If it doesn't, consider making a new user with the API.
Adding/modifying users with the API
Now that DISABLE_AUTH is set to false, we need a way to add users, or update passwords. Luckily, Open OSCAR Server can do that via the API, with a couple of key commands. You'll need curl if you don't already have it.
Adding users to Open OSCAR Server
To add a user, we need to use curl to post a username and password to the server on port 8080:
curl -d'{"screen_name":"NEWUSERNAME", "password":"NEWPASSWORD"}' http://localhost:8080/userOK, so there's a bit going on here:
- Using
curlwith the-dflag specifies we're sendingPOSTdata. - Inside the brackets we're sending two key/value pairs, one for
screen_nameand the other forpassword. - We're sending this
POSTdata to the Open OSCAR Server endpoint athttp://localhost:8080/user.
Updating the password for a user in Open OSCAR Server
Updating a password for a user is a similar process, but a smidge different:
curl -X PUT -d'{"screen_name":"NEWUSERNAME", "password":"NEWPASSWORD"}' http://localhost:8080/user/passwordLet's walk through curl again:
- This time we use the
-X PUToption, because updating an existing user on the server requires it, instead ofPOST. - Inside the brackets are the same two key/value pairs we had before, only now
screen_namehas to be a screen name that exists already. - The Open OSCAR Server endpoint for the API is now
http://localhost:8080/user/password.
There's a lot more you can do with the API, including deleting users, adding chatrooms, and more. Luckily the docs are your friend.
Backing up Open OSCAR Server
Ultimately with this project, we're dealing with a SQLite database and some configuration files. It's very easy to manage backups.
My VPS does a full system backup nightly, which works great. I've tested restoration and it works as expected.
Before making big changes, I make sure to stop the server, then rsync the contents of the working directory over to my backup machine. Using something like Borgmatic would make this much easier, and I plan to cover it in depth in a follow-up post.